
Configure Azure Entra ID as IdP on Keycloak
For a new project, I needed to use Keycloak as an Authentication Provider in a Spring Boot WebFlux application. Since the company I work for has a Microsoft Entra ID (formerly Azure Active Directory), the ideal solution was to connect Entra ID as an Identity Provider in Keycloak using OpenID Connect.
Despite the number of articles on the subject, it took me some time to find the correct configuration and discover certain tricks to finalize the setup. Here are the detailed steps.
Azure Configuration
Let’s start by logging into Azure.
The first tip is to switch your interface to English if it is not already done. Some authentication-related terms are poorly translated. For example, a tenant becomes a locataire in French, and claims become revendications. This can make the interface harder to understand.

- Click on Microsoft Entra ID
- Select App Registration
- Click New Registration
Give it a name, such as keycloak, choose Single tenant, and click Register. We will fill in the URI later.
Keycloak Configuration
If not already done, create your Realm, for example, ght1pc9kc.
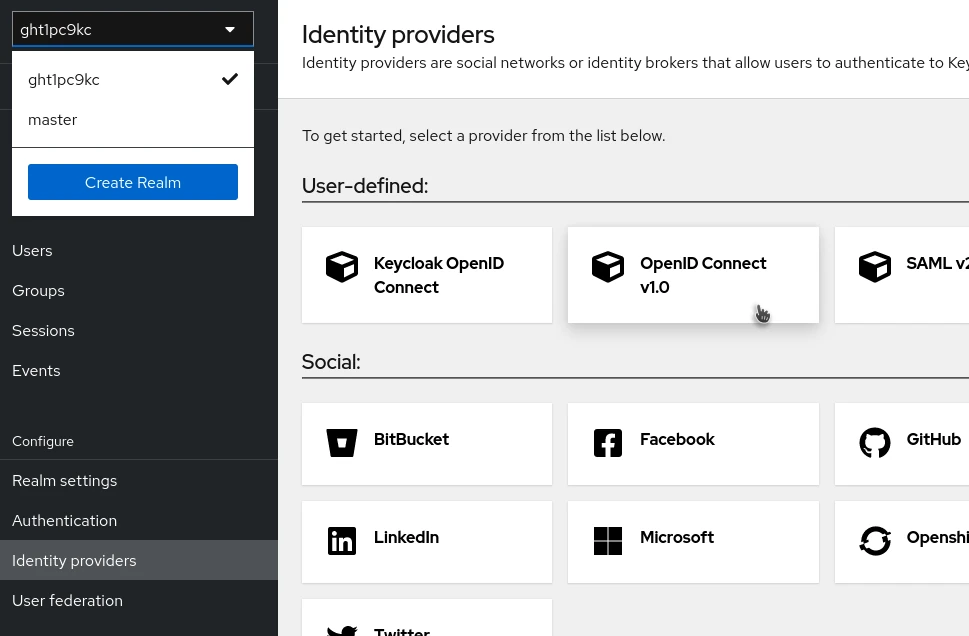
Then go to the Identity Providers menu.
Be careful! There is a Microsoft option, but do not choose it. While functional, it does not allow some settings we will configure later.
- Set the alias to
azure - The display name shown on the login screen:
Azure AD - Set the display order if needed
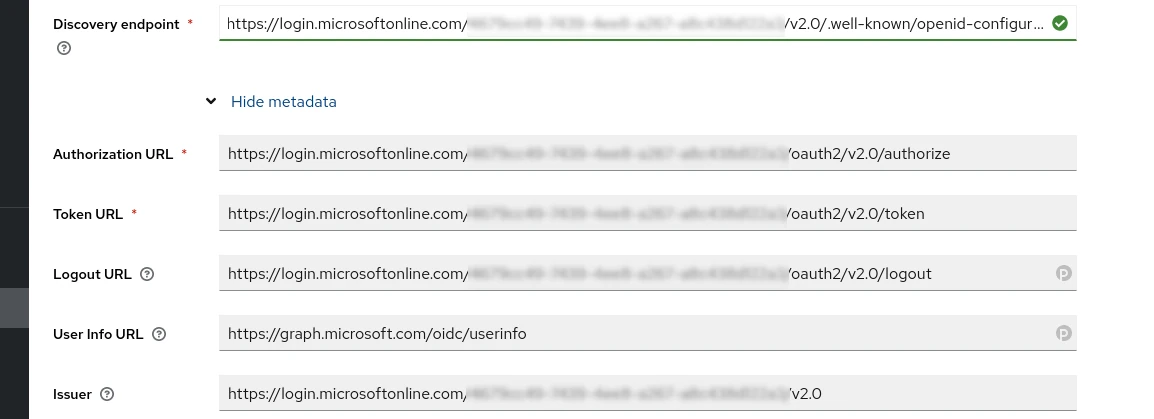
Discovery Endpoint
Go back to Azure. In the application we just registered, click on Endpoints to display the list of application endpoint URLs.
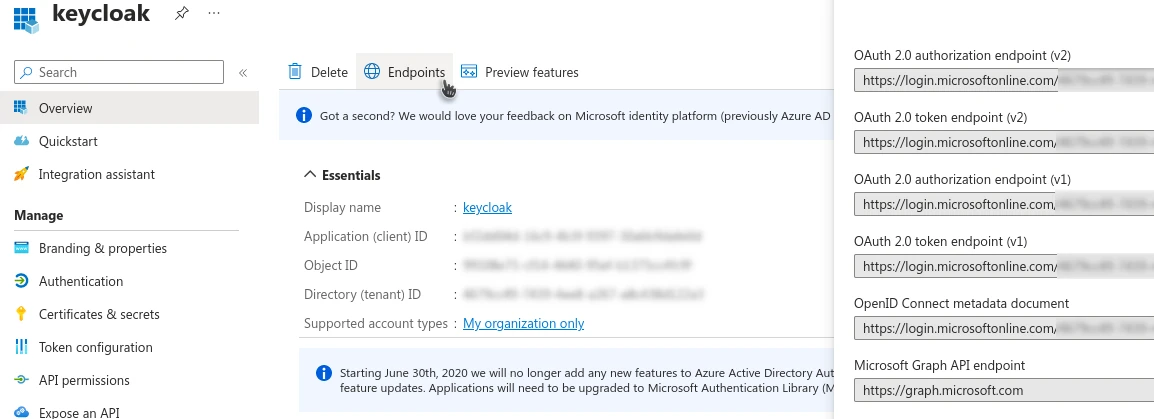
The one we need is OpenID Connect metadata document. Copy it and paste it into the Discovery Endpoints field in the Keycloak configuration. This will automatically populate all the URLs from the metadata.
- Client authentication:
Client send secret as post - Client ID: This is the Application (client) ID found in the Azure application overview (see screenshot).
Secret ID
In Azure, still in the application settings, go to Certificates & Secrets.
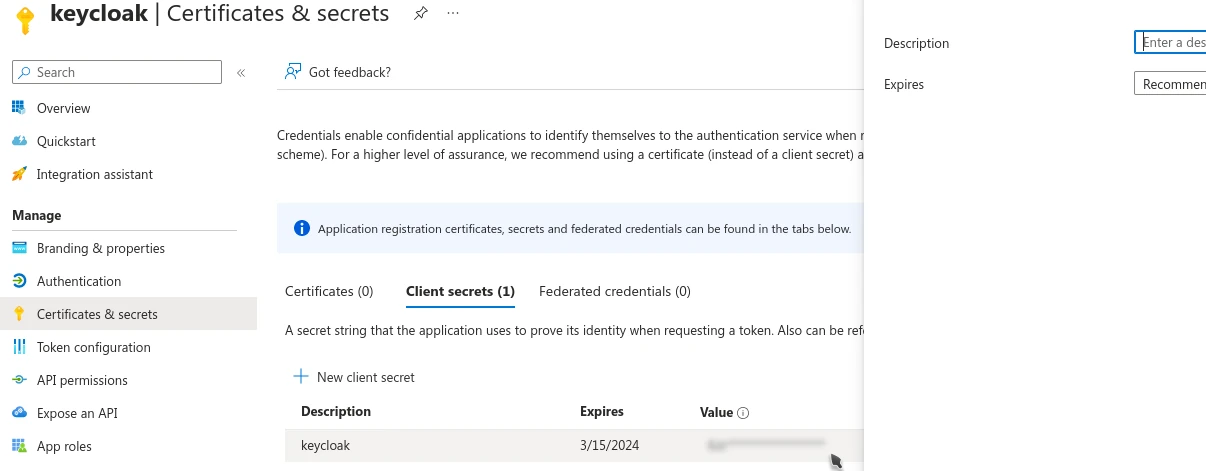
Give it a description and an expiration period. Then copy the Value of the secret. Be careful, the secret is only visible one time. If you close this screen, you won’t be able to retrieve it again.
Paste this secret into the Client Secret field in the Keycloak Identity Provider configuration.
Finally, click Add to add the Identity Provider.
Final Configuration Steps
Go back to the Identity Provider we just created. In Advanced Settings, open the advanced section:
- Scopes:
openid profile email - Trust email:
On, to indicate that emails from Azure are verified - Sync mode:
Force, so Keycloak updates the user data at every login, not just the first time.
For the rest, the default values are sufficient. Don’t forget to save.
Redirect URI
Finally, in the Identity Provider settings, copy the Redirect URI at the top of the page. Then go to Azure, in the Authentication menu.
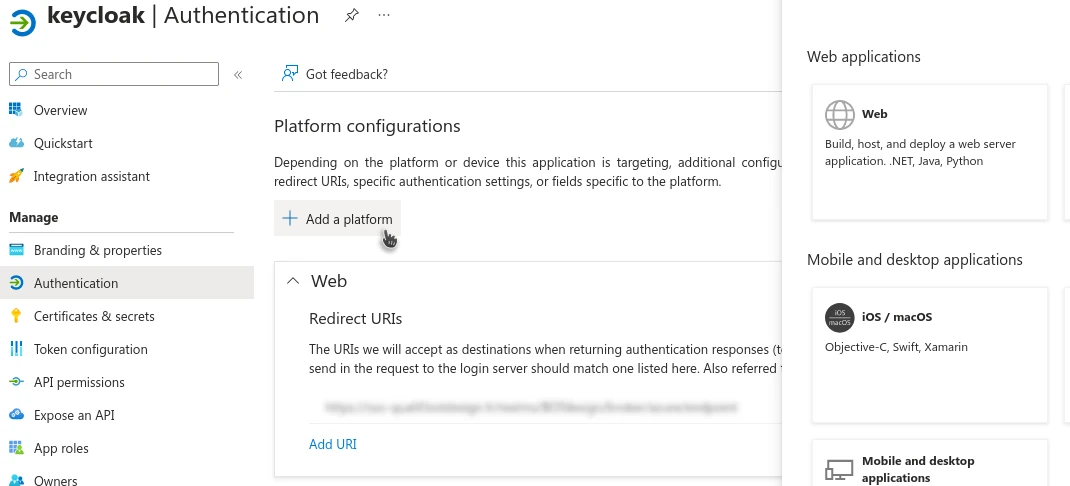
- Click Add Platform
- Choose Web
- Paste the URI copied from Keycloak
First Test
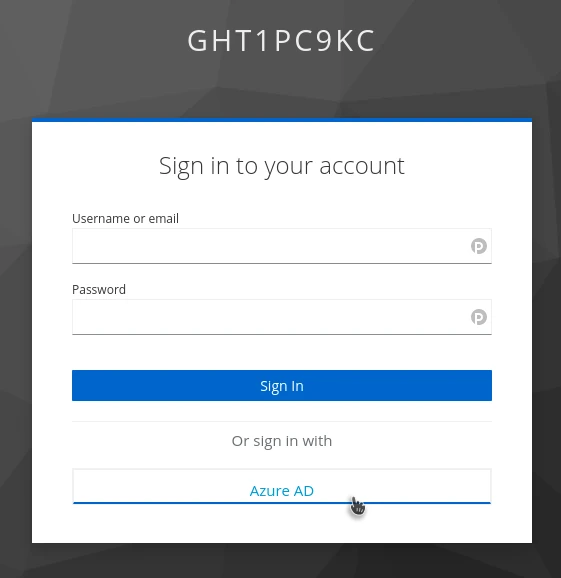
At this stage, the integration is functional. If you go to the Clients menu in Keycloak, you can open the account URL and log in.
Do not enter your credentials in the login window; instead, click Azure AD. You will be redirected to Azure to authenticate. At the end, Azure will ask for your consent to share your data with Keycloak.
Once logged in, you can view your account information retrieved from Azure in Keycloak’s account interface.
If you check the Keycloak administration interface, you will see that a user has been created.
Retrieving Groups
Authentication works, but we have not retrieved the user’s authority information. It would be useful to map the user’s Azure groups to Keycloak roles so that permissions can be managed directly on the Azure server.
Add Azure Groups to Claims
By default, Azure does not include groups in the token claims. To modify the token, go to Token Configuration in Azure.
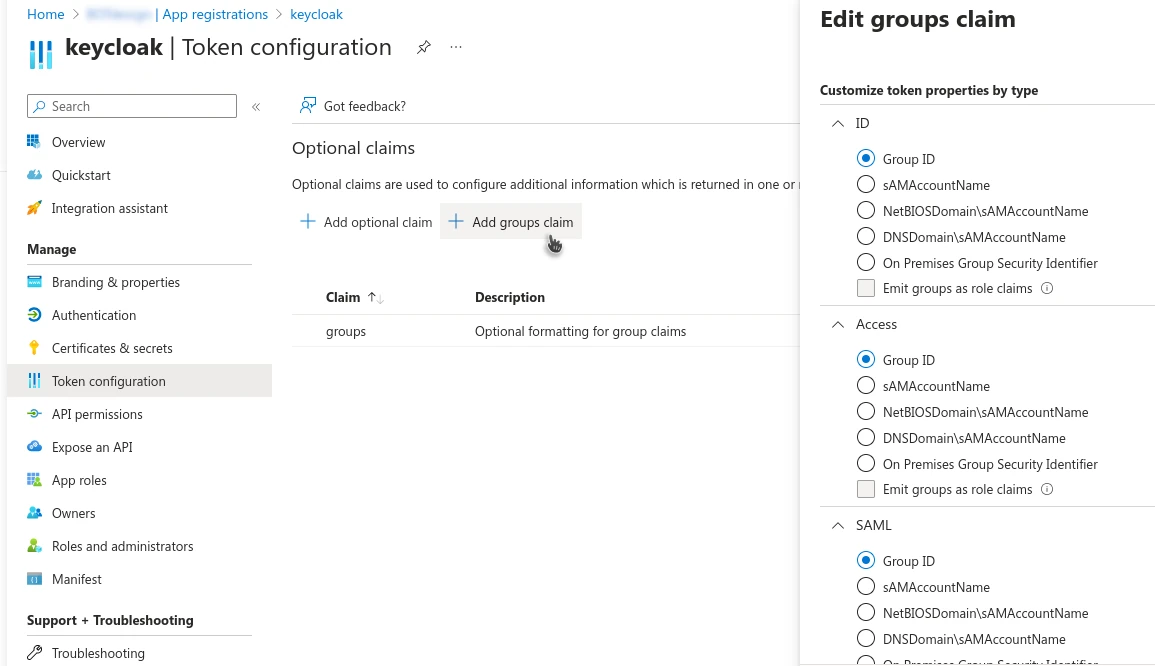
Click Add groups claims. Then, choose how the groups should be transmitted in the token: by ID, by name, etc.
I recommend using ID unless you have specific reasons for another option.
Some articles suggest modifying
groupMembershipClaimsin the manifest and changingnulltoAllorSecurityGroup, but this did not work for me.
Mapping Roles in Keycloak
Now return to Keycloak and create roles corresponding to your Azure groups.
Then, in the Azure Identity Provider settings in Keycloak, go to the Mappers tab and add a new mapper.
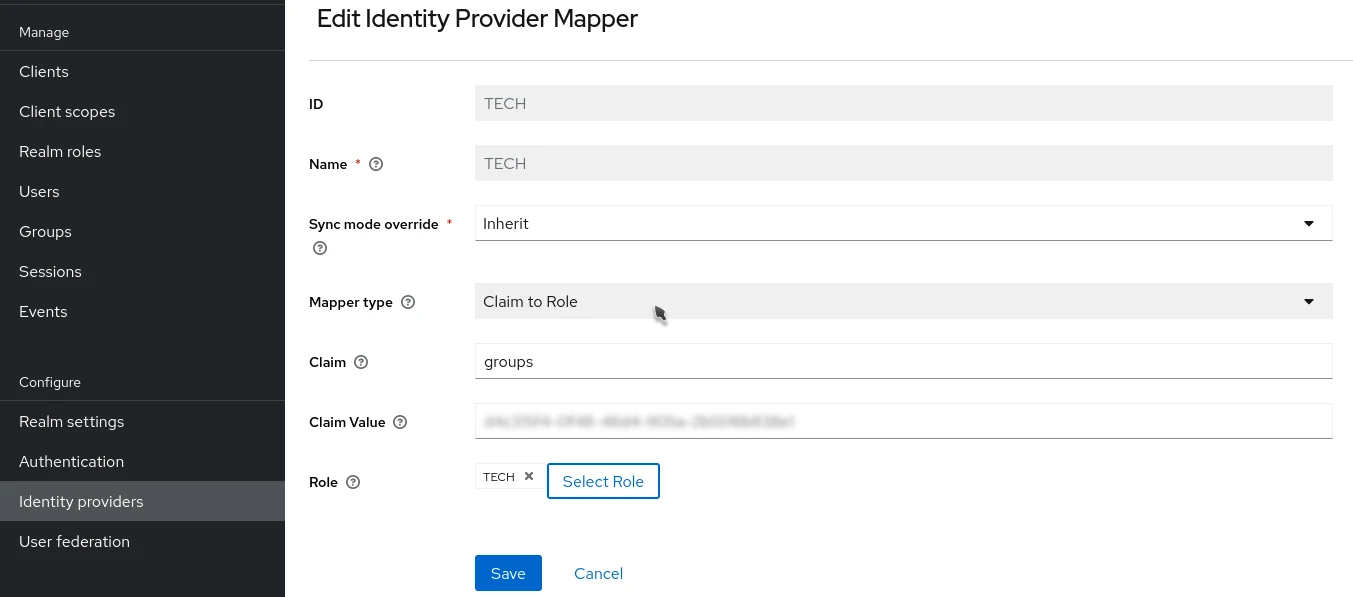
- Sync Mode:
Inherit, to enforce updates like the IdP information - Mapper Type:
Claim to Role - Claim:
groups - Claim Value: the Azure group ID
- Role: the corresponding Keycloak role(s)
Include ROLES in the JWT Token
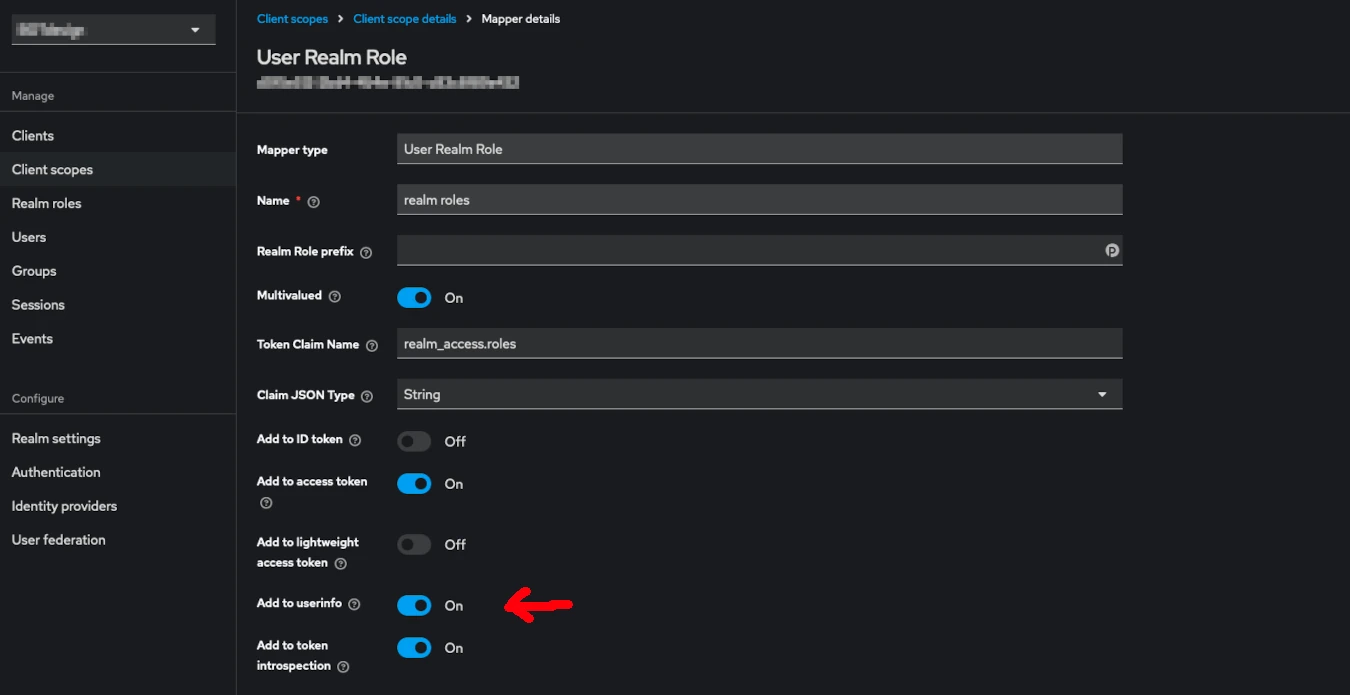
A final step is needed to include ROLES in the JWT token. This allows the backend to access them without needing to query Keycloak.
In Keycloak, go to the correct realm, then Client scopes -> roles -> Mappers -> realm roles. Enable Add to userinfo and save.
Final Test
If you return to the account interface and go through the login process again, you will see that the user now has roles corresponding to their Azure groups.
Conclusion
Ultimately, the process is not complex, but some details are not intuitive and can be time-consuming.